 Preparing and painting the card
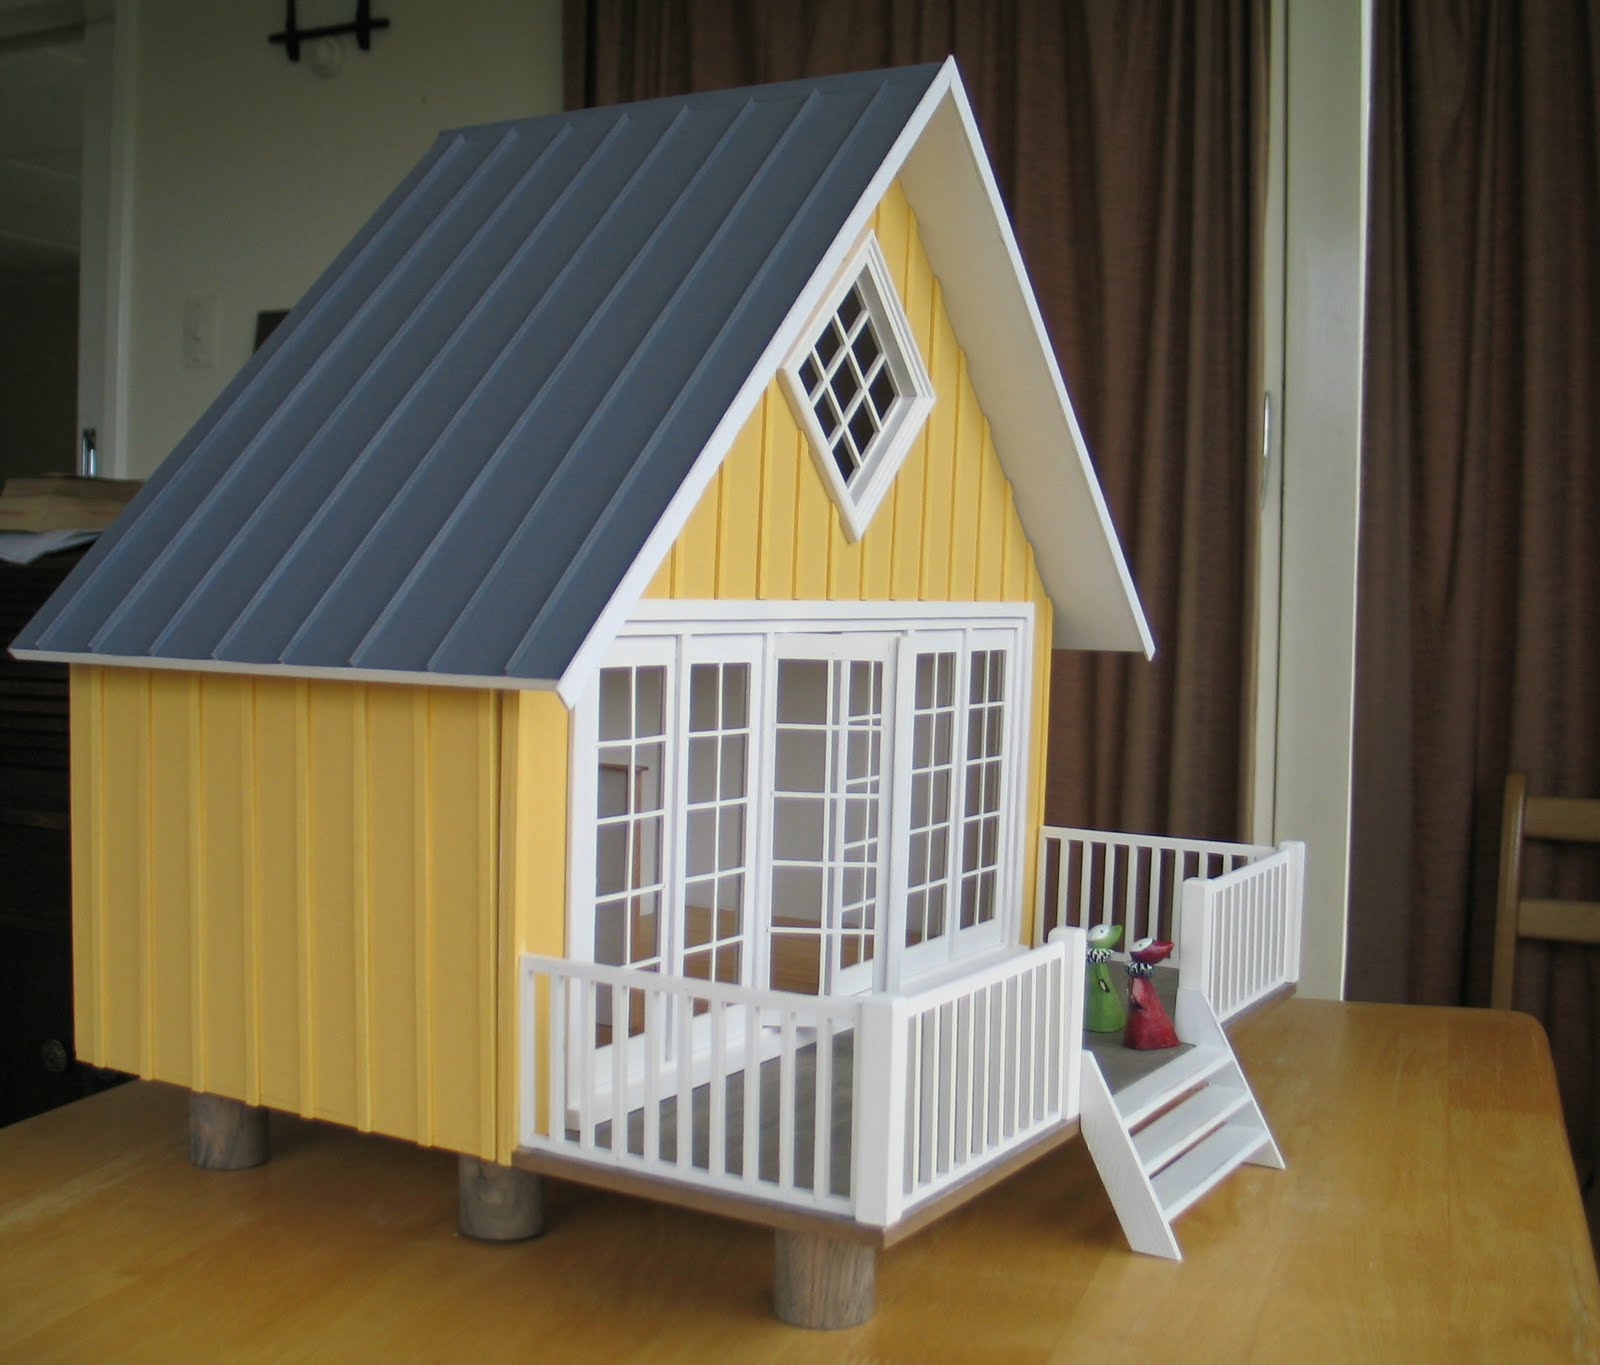
 Here is a quick tutorial on how I made the roof of the lakehouse. It was made to resemble flat metal roofing joined by ridges.
You need thin non-shiny card for this project, it can't be too thick/stiff or you won't be able to get the ridges fine enough.
 You'll need to work out which way the grain runs in the card, and make the folds along the grain, not against it. This will help a lot to get the ridge lines fine.
I have done this in the photo using two square sheets of paper and joining the edges of each - one is joined with the paper in one direction, and the other in the opposite direction. You will see that one piece sits lower than the other (the piece on the left) - this has the grain along the foldline and shows less resistance. If your ridge lines follow this foldline they will behave better.
This can usually be done simply just by holding the card or paper and trying to bring the edges together; you'll be able to feel the resistance in your hands.
For those of you who want to make mini books, use the same technique to place the folds of your pages - they will sit together more happily and won't want to fly open so much.
 Measure your roof and work out the size of the card - add more to the width to allow for the folds. I find it's useful to add some extra at the back of the roof as the final measurements can vary a little due to the nature of the ridges - it can be trimmed off later.
Rule lines where the folds will go - I spaced mine at 4.5cm (1.75"), then rule more lines 4mm (5/32") from each side of the foldlines.
 Score the lines with an embossing tool, then fold each line backwards and forwards to set it in place.
 Mix your acrylic paint to the colour you want. I used 1 part burnt umber, 2 parts black and about 7 parts white. Remember that it will darken when dry. I also found that it looked very much darker than I thought it would - this is because of the shadows cast by the ridges.
It's a very good idea to make a small test 'roof' first to trial colour and technique and final look.
 Paint the non-ruled side of the card with the paint. The acrylic paint will show paint strokes, so try to paint as straight as possible parallel to the ridges.
Roof ridge - paint another strip about 4-5 cm (1.5" - 2") wide, and longer than your roof ridge, in a similar manner.
Let it all dry thoroughly, overnight if possible, as the paint needs to harden well so it doesn't crack when folded.
Muchas gracias por compartir el tutorial. El resultado es excelente.
ReplyDeleteBesitos, May
Gracias por el tutorial, ahora entiendo cómo lo has conseguido. Besos Clara.
ReplyDelete